Bring your QuickBooks expense data into NoteLedger by exporting a transaction-detail report and uploading it. NoteLedger reads the QuickBooks accounts in the file and lets you map each one to a NoteLedger category, so costs land on the right notes automatically.
Export a transaction-detail report from QuickBooks
In QuickBooks, run a Transaction Detail (or Transaction List by Account) report for the period you want to import, and set the date range. Make sure Collapse Rows is unchecked — unchecking it itemizes charges made on the same day as separate rows instead of combining them into a single total, so every transaction imports individually. Then use QuickBooks' own export control to save the report as Excel (
.xlsx) or CSV. NoteLedger reads the account names and amounts from this file.Open the QuickBooks card in NoteLedger
In the top-right account menu, click your email, then open Integrations and find the QuickBooks card.

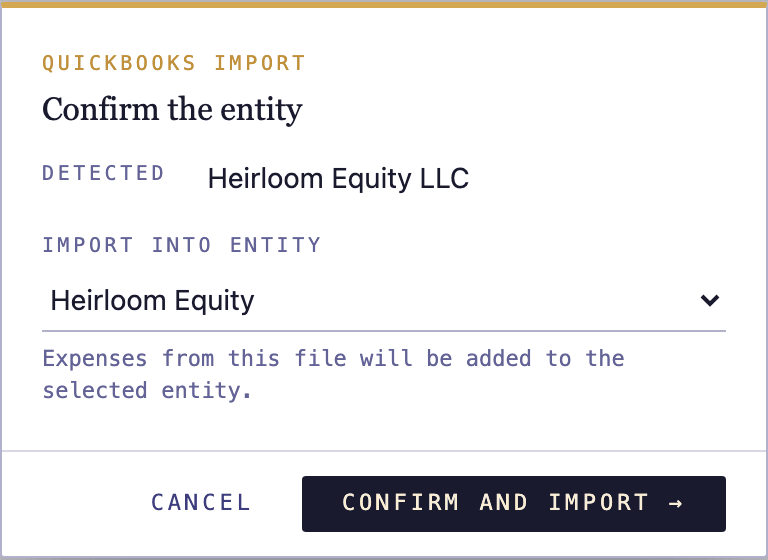
Choose the entity and upload your file
Click Import, choose the file you exported, and confirm the entity the transactions belong to. NoteLedger inspects the file and suggests a matching entity — confirm or change it before continuing.
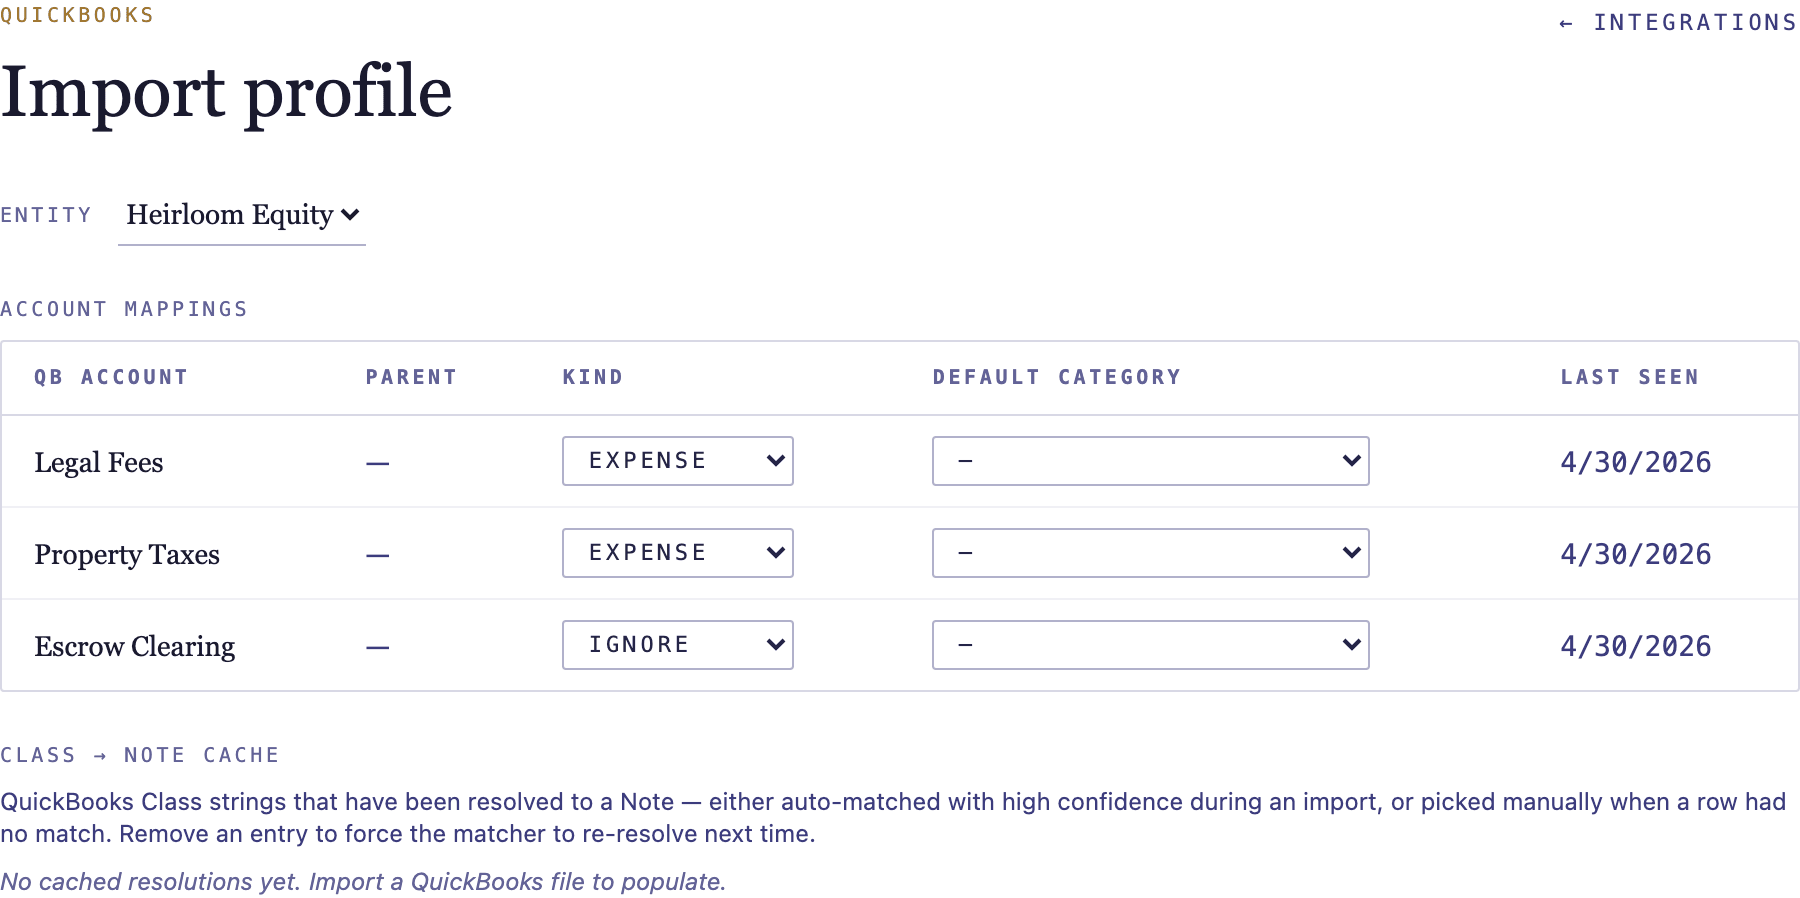
Map QuickBooks accounts to categories
Open View profile to see every QuickBooks account NoteLedger found. For each account set its kind (expense, income, asset, liability, or ignore) and, for expenses, pick the NoteLedger category it maps to. NoteLedger remembers these mappings, so future imports classify the same accounts automatically.
Import and review
With your accounts mapped, run the import. Transactions are matched to notes and recorded as costs in the categories you chose. NoteLedger automatically de-dupes transactions seen in overlapping date ranges, so re-importing an overlapping report won't double-count costs.
